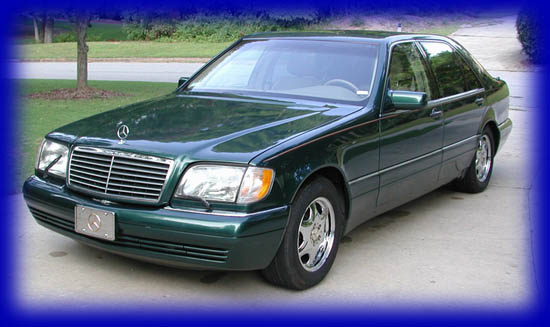
This is a how-to guide to replace the Door Checks on a 1998 Mercedes S500, aka body style "140". This article is of my own making, and from my own research. If you use any of the material within then, like me, you're on you're own. You can't hold me or anyone else responsible for whatever, so if you don't feel comfortable doing this sort of mechanical work, then take your car to an authorized mechanic.
This car's going on 8 years old, and at about 70k miles it's starting to show some age. As yall know this is my project car, and I'll get around to a complete a full restoration within say, the next 30 years or so.
One of the little irritants that shows itself every time I get into the car is the door swinging noise - clunking clacking and being generally obnoxious. I tried all the normal stuff on the door like lubricants and what have you, but I figured the DOOR CHECK was just worn out, and I was right. The door check is this little boxy looking set of ball bearings on a greased slide that gives you that Mercedes super cool door-slide look sound and feel. You know - to impress all your friends at the yacht club (or in my case the pool hall). These door checks are bolted into the inside of the door, right up front.
Door checks indeed check the door. Keep it from swinging too far, catch it when the wind tries to break it off the hinges. But seemingly benign, there's a caveat that makes them somewhat critical. If they break they'll usually tear up a good portion of the door's interior. Rule of thumb is that if door checks break then the regulator frame will go with it. So give them some attention, not just for cosmetic reasons.
There's really no way to get to the checks without taking off the dreaded door panels (notice not the whole door - just the inside panels is all that you've got to do). I was afraid I'd tear up the leather, wood and all the other S class stuff around there. So I bought lunch for the local MB dealer's shop foreman and came away with the sure fire method of tearing it apart. In fact I did one at the Dealer to practice, some poor soul was being charged 3 hours of shop time (for each door). Same method can be used to dig into the rest of the door, like regulators, pneumatics, electrics and such.
Like the others, this little DIY is somewhat laborious, but still pretty simple. So this is how I did it, and I certainly hope it will help all you DIY's out there that have been contemplating the same task. Good luck!
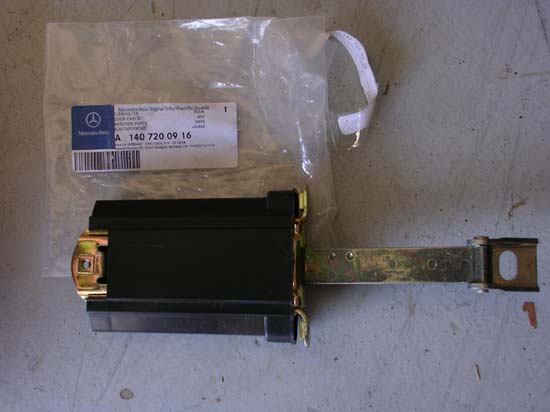
The new one. Notice for my car (1998 and newer) this is the wrong part - I had to go exchange it. The right one for late model 140's is 140 720 06 16. The reason I show this is the Mercedes parts catalog still shows this one as correct - which it's not. Just ask the parts guy for the 06 not the 09 unless you've got a -97. See Phil for this, surprisingly inexpensive. Like $30 or so.
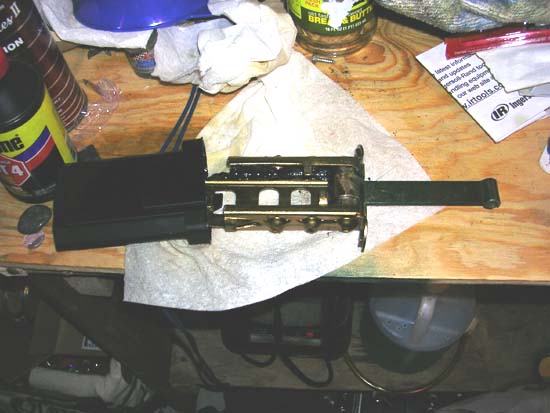
The old one. Notice the ball bearings have worn track slots completely down the tracks.
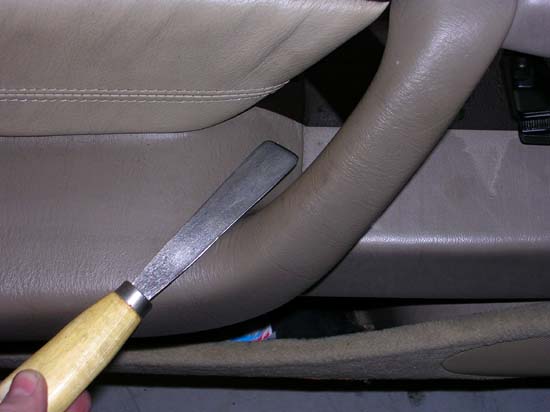
Ok, here we go. This has got to be the worst of it. I rounded off a doo-whigger with a grinder and polisher, and is remarkably like the official MB tool ($$). This one cost me like a dollar for 5 of them at Home Depot..
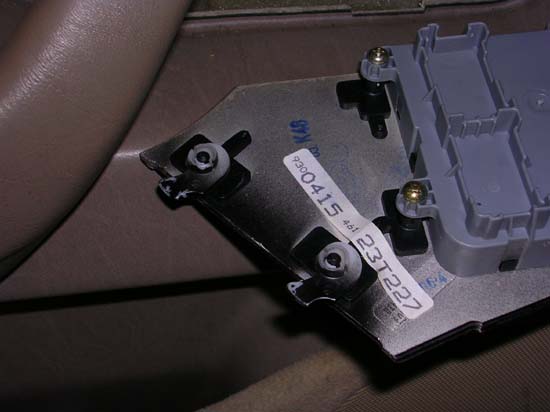
This is the back of the wood panel (see below). Those little tabs flip up with your putty knife-opener you just made.
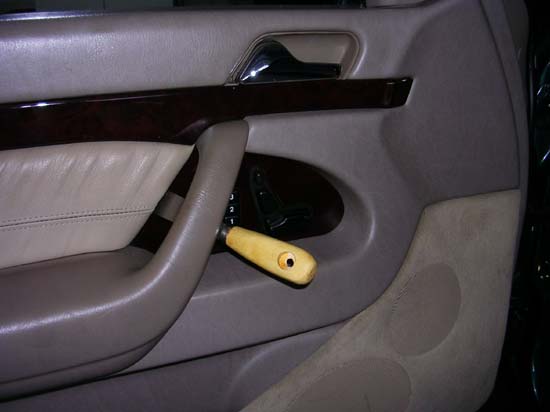
But here's why I was so nervous. You've got to slide it very gently past the leather, and about a 1/2" into the back of this wood panel. Don't even think of cracking this wood, it's like a $4,000,000.00 part. But this is the reason I wanted to get some pics on this - I couldn't for the life of me picture how this unhooked until I actually did it. Anyway, slide the blade up in the slot to catch both tabs, and flip them up. The back comes out first. Work this out GENTLY. Take the pills that comes with the kit, take your time, drink a beer. Back first, then the front. It'll come off.

Just unplug it for now. Notice the tab in the front? When you put it back in, do it backwards. Flip the tabs back down, back goes in first, then push in the front and it snaps right in. Two screws in this compartment, one high, one low.
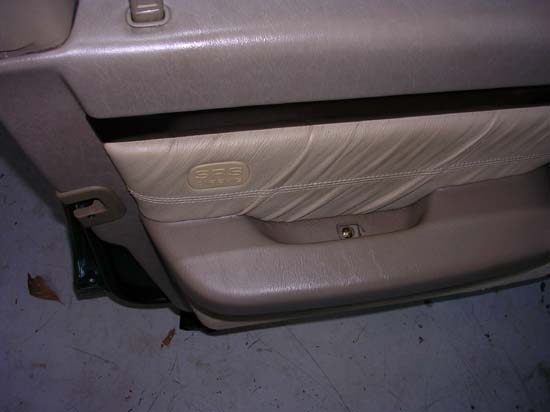
I took this pic because there's a screw underneath the little plastic tab. One of the 5 or so door screws you've got to take out. See that little "SRS" plastic piece? It snaps off, and reveals another screw that's got to come out. The door airbag is right under this layer.
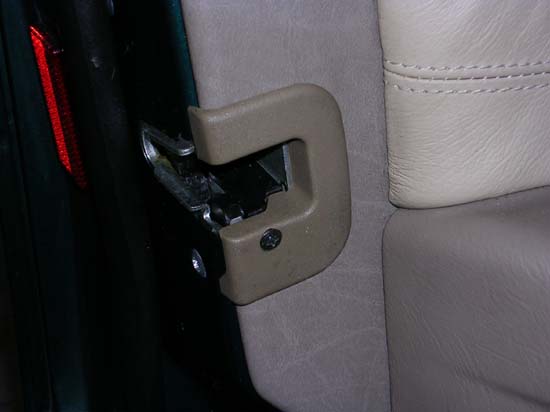
Take this little fella off. Just one screw, but it holds that whole end of the door panel secure.

There's no good way to show it without a movie, but the next step is to actually pull the panel off. You must cuss for this to go well. The panel is held in with a bunch of plastic tabs (see the holes around the door). May as well buy a pack of them, they're brittle and you're certain to break a bunch. They're cheap. According to WIS, you're supposed to pull up the back, push it forward, lift it up, forward, out back and down all at the same time. If you play a John Phillip Susa tune int the background it'll seem more exciting. But like the rest of MB interior stuff, go real slow. Note the little slot bar on the window squeegee. The lip of the door actually sits into this slot.
Like I said before, I think these door checks should come with a bottle of Valium.
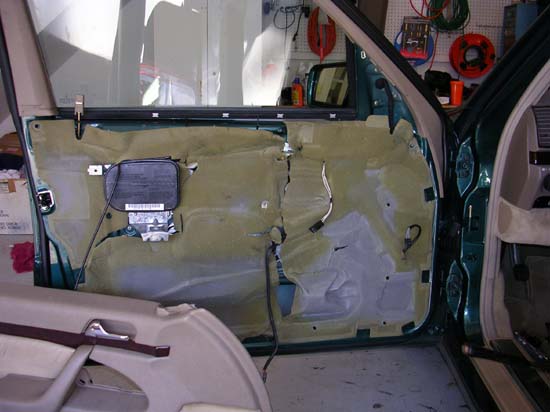
Notice airbag. The "triangle" on the inside of the mirror just pops out - from the TOP first. There's some insulation in there that's got to go back. Also not shown is the speaker case, which just unscrews. Be careful as the speaker grill stays in the door and the face of the speakers are now exposed and unprotected. Those are real Bose speakers (14 of them?) and like the rest of it, cost a zillion to replace if you're not gentle. Unplug it and set it aside. Notice the hole I punched in the bottom of the insulation? That's so I could stick my arm up there and pull out the door check when I unscrewed it.
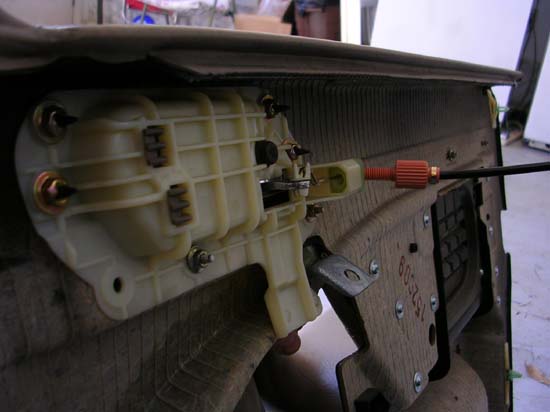
This is the door latch cable. There's a quick way to undo this, but I didn't fool with it. I just carefully hung the door panel with a coat hanger so there wouldn't be any pressure/pull on this cable.
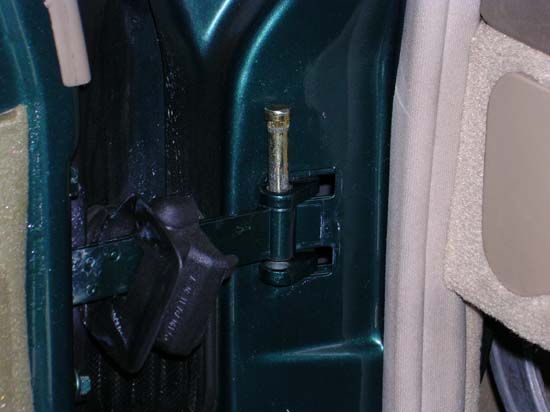
Pop out the pin. It's got a little retainer on the bottom like a "C" ring, just pull it off. I tapped mine out with a small hammer from the bottom. Boot was in good shape, stays dry around there.

Just unbolt the old door check. 10mm. There's another 3rd bolt on the inside of the door, then it just drops out. Notice the pin is out. Put the new one in through the hole (see above), bolt it up - but don't over torque those 10mm bolts. Go in reverse and put it all back together.
Hint: put the plastic door tabs in the panel and pop the panel onto the door straight in. My finding was if you try to work the panel forward, then backward, then up then down then all around like the manual says you'll drive yourself crazy.
Hope this helps. If you do this once, it'll take you 3-4 hours. The second time you do it it'll take you 15 mins. With the new door checks, now my doors just glide shut like they're supposed to - no noise, clunking or flopping around!
As I always mention, please take the time to check out Jim F's site - a lot of good info on S class Mercs on his site.
Now - on to the next project...
Greg B
CategoryDiy